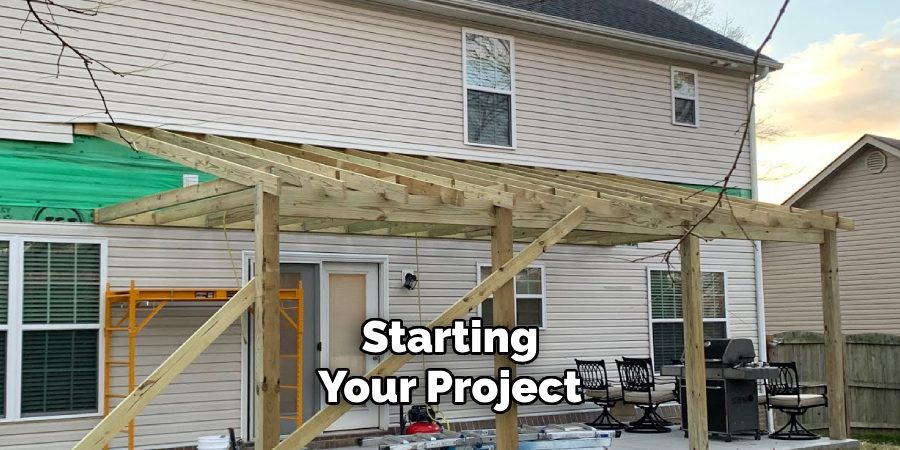
Attaching a patio roof to an existing house can transform your outdoor space into a functional and inviting area. Whether you’re looking to create a shaded retreat, protect your patio furniture from the elements, or simply enhance the overall aesthetic of your home, adding a patio roof is a practical solution. With the right tools, materials, and proper planning, most homeowners or contractors can accomplish this project.

This guide on how to attach a patio roof to an existing house will provide you with the essential steps and tips to ensure a secure and seamless integration with your house.
Why Add a Patio Roof?
There are numerous benefits to attaching a patio roof to your existing house. Here are some of the most compelling reasons why you should consider this home improvement project:
Weather Protection:
A patio roof provides shade and shelter from harsh weather conditions such as intense sun, rain, and wind. It can also extend the use of your outdoor space throughout the year, making it more comfortable and enjoyable for you and your family.
Increased Home Value:
Adding a patio roof not only enhances the aesthetic appeal of your home but also increases its market value. It’s an attractive feature that potential buyers will appreciate, making it a desirable investment should you decide to sell your house in the future.
Versatility:
A patio roof is a versatile addition to your home. It can be designed and customized in different styles, materials, and sizes to suit your specific needs and preferences. You can also add additional features such as ceiling fans, lighting, or even a skylight for added functionality.
8 Steps on How to Attach a Patio Roof to an Existing House
Step 1: Check Local Building Codes
Before starting your project, it’s essential to check your local building codes and regulations. These codes will help ensure that your patio roof is built safely and in compliance with local laws. Contact your local building department to find out about any required permits, setback requirements, or structural guidelines. Ignoring these rules could lead to potential fines or issues down the line, so take the time to research and understand what is allowed in your area.

This step will serve as the foundation for a smooth and hassle-free construction process. The building department will also be able to provide you with valuable information and resources, such as recommended materials or structural requirements.
Step 2: Determine the Location & Size
The next step is to determine the location and size of your patio roof. This decision will depend on factors such as the layout of your house, available space, and your intended use for the area. When choosing a location, consider how much sunlight and shade you want, access to an existing door or window, and any potential obstacles like trees or utility lines.
Once you have decided on a location, measure the area carefully to determine the size of your patio roof. Take into account any overhangs from the house or desired clearance for furniture and other items.
Step 4: Prepare the Support Beams
The support beams will be the backbone of your patio roof, so it’s crucial to prepare them properly.
Begin by measuring and cutting pressure-treated lumber to the desired length for both the front and back of your patio roof. Next, attach joist hangers to the inside end of each beam using galvanized nails or screws.
Step 5: Attach Ledger Board
The ledger board is a critical component that secures the patio roof of your house and helps support its weight. Start by selecting a sturdy ledger board made of pressure-treated wood to ensure durability and resistance to the elements. Measure and mark the exact placement of the ledger board on the wall of your house, ensuring it is level and properly aligned with the desired roof height.

Before attaching the ledger board, locate the wall studs in your house using a stud finder. Drill pilot holes into the studs to provide a secure anchor point. Then, position the ledger board against the wall and secure it using lag screws or bolts through the pilot holes, anchoring it firmly to the studs. If your house has a brick wall or masonry, you may need to use concrete anchors or masonry screws for proper attachment.
Step 6: Install Support Beams
With the ledger board securely in place, the next step is to install the support beams that will hold up the outer edge of the patio roof. Begin by marking the placement of the support posts on the ground, ensuring they are evenly spaced and aligned with the ledger board for proper structural stability. Dig holes for the support posts to the required depth, typically at least 2 to 3 feet, depending on local building codes and the height of the roof.
Set the support posts in the holes, making sure they are plumb and properly aligned. Concrete is used to secure the posts in place, fill the holes, and allow the concrete to cure completely before proceeding. Once the support posts are stable, attach the horizontal beams to the top of the posts to form the framework. Use galvanized hardware such as bolts, brackets, or screws to ensure a secure connection between the posts and beams.
Step 7: Add Roofing Material
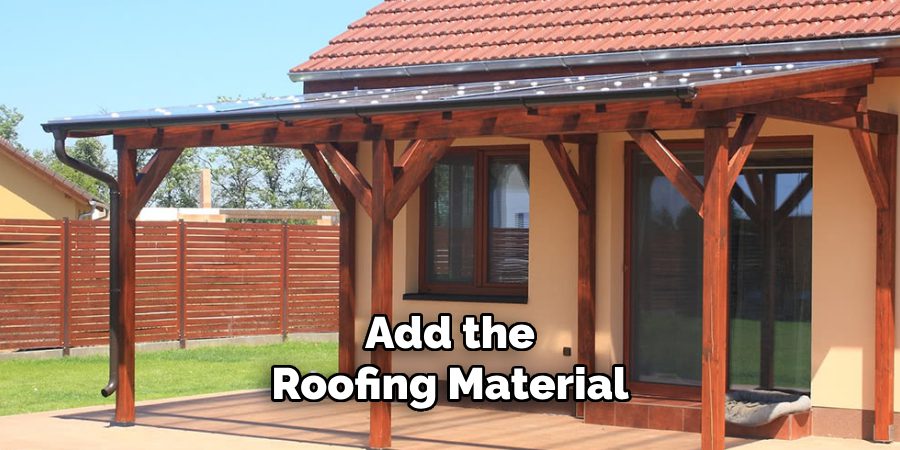
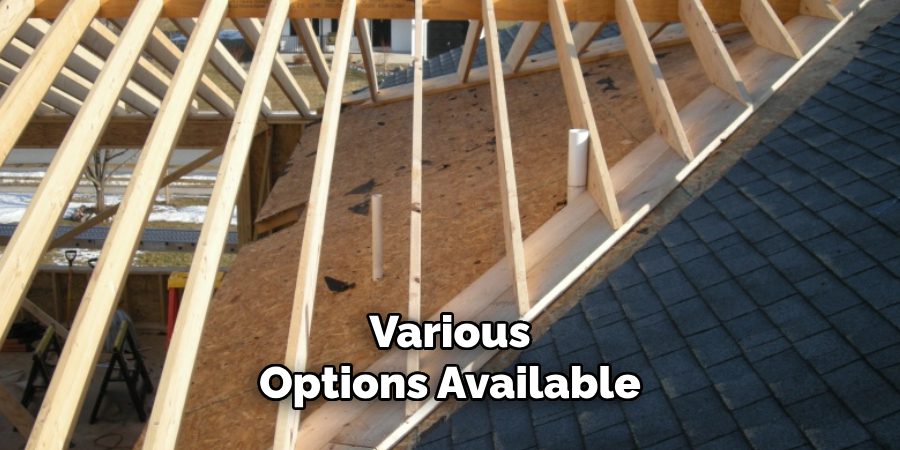
With the frame in place, it’s time to add the roofing material. There are various options available, such as shingles, metal panels, or polycarbonate sheets. Choose a material that is durable, weather-resistant, and matches the overall aesthetic of your house. Measure and cut the roofing material to fit your patio roof, ensuring there is enough overlap for proper water drainage.

Install the roofing material according to the manufacturer’s instructions, starting from one end and working your way across. Use galvanized nails or screws to attach the roofing material securely to the beams and posts.
Step 8: Finish & Personalize
The final step is to add any finishing touches and personalize your patio roof. This could include adding lighting fixtures, ceiling fans, or outdoor curtains for added privacy and comfort. Consider adding additional features like a built-in grill or bar, a fire pit, or comfortable seating to make the space even more enjoyable.
With these steps on how to attach a patio roof to an existing house in mind, you can confidently attach a patio roof to your existing house and enjoy all the benefits it has to offer. Remember to always follow safety precautions and consult with professionals if needed for a successful and safe construction process. Now, get ready to sit back, relax, and enjoy your new outdoor living space all year round! So go ahead and start planning your perfect patio roof today!
Frequently Asked Questions
Q1: Do I Need a Permit to Build a Patio Roof on My House?
A1: It is essential to check with your local building department for any required permits or regulations before starting your project. Ignoring these rules could lead to potential fines or issues down the line, so it’s crucial to research and understand what is allowed in your area.
Q2: What Materials Can I Use for My Patio Roof?
A2: There are various options available, such as shingles, metal panels, or polycarbonate sheets. Choose a material that is durable, weather-resistant, and

matches the overall aesthetic of your house. Be sure to also check with your local building department for any recommended materials or structural requirements.
Q3: How Do I Securely Attach the Patio Roof to My House?
A3: The ledger board is a critical component that secures the patio roof of your house and helps support its weight. It is essential to select a sturdy ledger board made of pressure-treated wood and securely attach it to the wall using lag screws or bolts, anchoring it to the studs for added stability. Be sure to consult with professionals if needed to learn proper attachment techniques.
Q4: Is It Necessary to Consult with a Professional?
A4: It is always recommended to consult with professionals, especially when dealing with structural elements such as attaching a patio roof to an existing house. They can provide valuable insights and ensure that all safety precautions are followed for a successful and safe construction process. Additionally, they may also be able to help obtain any necessary permits or recommend materials and designs suitable for your specific location.
Conclusion
By following these steps on how to attach a patio roof to an existing house and keeping these frequently asked questions in mind, you can successfully attach a patio roof to your existing house. With proper planning, safety precautions, and the right materials, you can create a beautiful outdoor living space that will provide shade and protection for many years to come.
Don’t forget to add your personal touches and make this space truly yours. Enjoy your new patio roof! So go ahead and start planning your perfect patio roof today! Remember to consult with professionals if needed and always prioritize safety throughout the construction process. Happy building!

Professional Focus
Oliver Wood, a passionate patio designer, specializes in creating comfortable and inviting outdoor spaces that enhance relaxation and entertainment. His work combines a deep understanding of design with a love for nature, making him a standout professional in the field of outdoor living spaces. Through his thoughtful approach, he transforms everyday patios into extraordinary retreats for family and friends.
About the Author
Oliver Wood, a skilled patio designer, shares his expertise on outdoor living through his designs and insights. With a background in patio design and a genuine passion for creating beautiful spaces, he encourages others to invest in their outdoor environments, enhancing their homes with functional and inviting spaces for relaxation and entertainment.
Education History
University: Virginia Union University
Oliver’s education equipped him with the knowledge and skills to design patios that merge aesthetics with comfort, transforming outdoor areas into beautiful extensions of the home.
Expertise:
- Patio Design and Outdoor Living Spaces
- Functional and Aesthetic Landscaping
- Comfortable and Inviting Outdoor Environments
- Design Philosophy for Family-Oriented Spaces
- Creating Spaces for Relaxation and Entertainment
