Proper maintenance of your garage door is essential to ensure it operates smoothly and safely. One common issue homeowners encounter is a loose or sagging chain, which can compromise the functionality and longevity of the garage door opener.
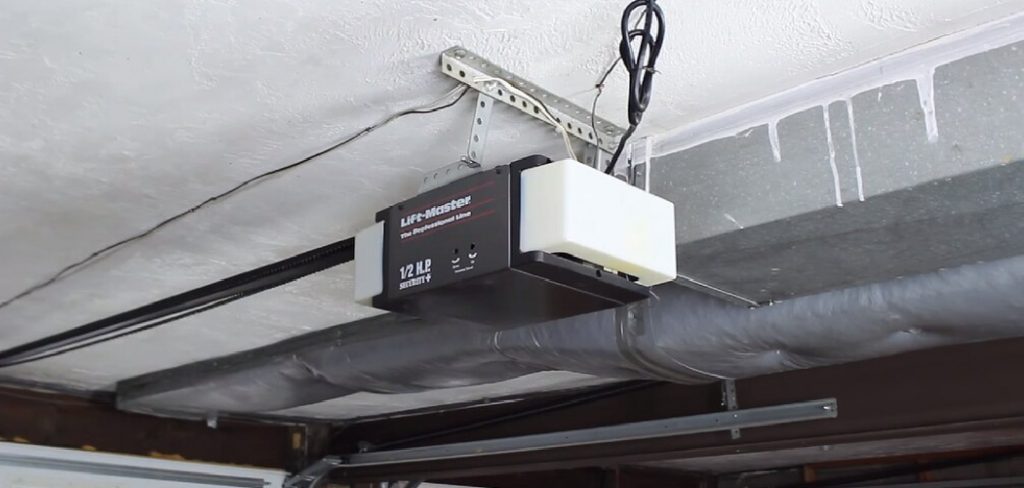
Tightening the chain is a straightforward process that can prevent unnecessary wear and tear while ensuring the door opens and closes efficiently.
This guide on how to tighten chain on garage door will walk you through the steps to safely and effectively tighten the chain on your garage door system.
Why does the Chain Need to Be Tightened?
The chain on your garage door plays a critical role in lifting and lowering the door smoothly. Over time, regular use, vibrations, and natural wear can cause the chain to loosen. A loose chain can lead to several issues, including noisy operation, jerky door movements, and even potential damage to the garage door system.
Additionally, a sagging chain may cause misalignment, which can strain other components like the motor or rails. Tightening the chain not only helps maintain the efficiency of the garage door opener but also prevents greater damage that might result in expensive repairs or replacements.
Needed Materials
Before getting started, it’s essential to gather the necessary materials. The following items will be needed:
Ladder:
Since the chain is located near the ceiling of your garage, you will need a ladder to reach it. Make sure the ladder is sturdy and secure before climbing up.
Socket Wrench:
A socket wrench with the appropriate size for your specific garage door opener model will be needed to adjust the tension on the chain.
Safety Glasses:
It’s always a good idea to wear safety glasses when working on any home improvement project, including tightening a garage door chain. These protect your eyes from any debris that may fall during the process.
Step Stool:
In some cases, a step stool may be needed to reach the opener’s motor housing.
7 Simple Steps on How to Tighten Chain on Garage Door
Step 1: Close Your Garage Door
Before beginning the process, ensure the garage door is fully closed. This step is crucial for safety and preventing the door from unexpectedly moving during the adjustment process.
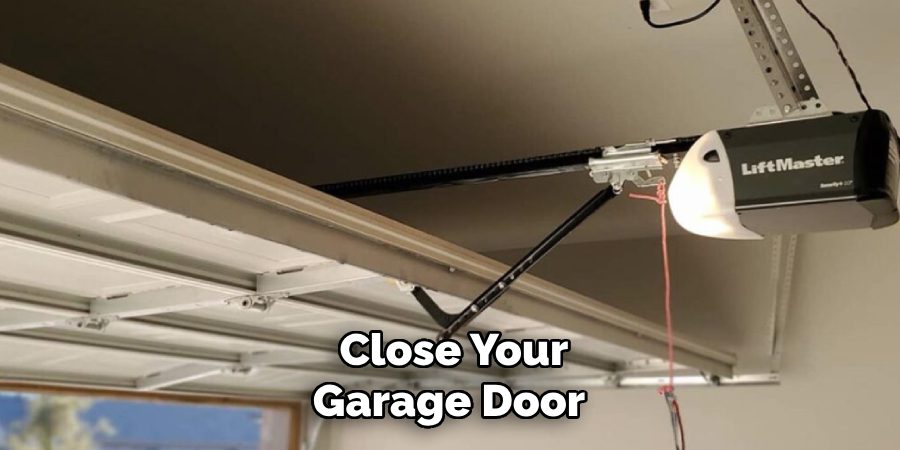
Disconnect the garage door opener from the power supply to avoid any accidental activation while you work. Confirm that the door is securely in place and will not open or move during the tightening procedure. This creates a stable and safe environment in which to proceed with the task.
Step 2: Locate the Chain
Once the garage door is closed and the opener is disconnected, locate the chain mechanism on your garage door opener.
The chain is typically situated along a rail that runs from the motor unit, usually found near the ceiling at the back of the garage, to the front, where the door is attached. Carefully inspect the chain to identify where it sags or appears loose. You will also notice a tension adjustment bolt near the motor unit, which is what you’ll use to tighten the chain.
Step 3: Identify the Tension Adjustment Nut
Look closely at the chain near the garage door opener’s motor unit to find the tension adjustment nut. This nut is typically located on a threaded rod that connects to the chain. It serves as the mechanism for adjusting the chain’s tension.
Carefully examine it to ensure you have identified the correct component before proceeding. If needed, refer to your garage door opener’s manual for clarification, as the location and appearance of the tension adjustment nut may vary based on the model.
Step 4: Loosen the Locking Nut
Before you can adjust the tension on the chain, you’ll need to loosen the locking nut that holds the tension adjustment nut in place. The locking nut is typically located on the same threaded rod as the tension adjustment nut and is positioned to secure it. Using a socket wrench, turn the locking nut counterclockwise to loosen it.
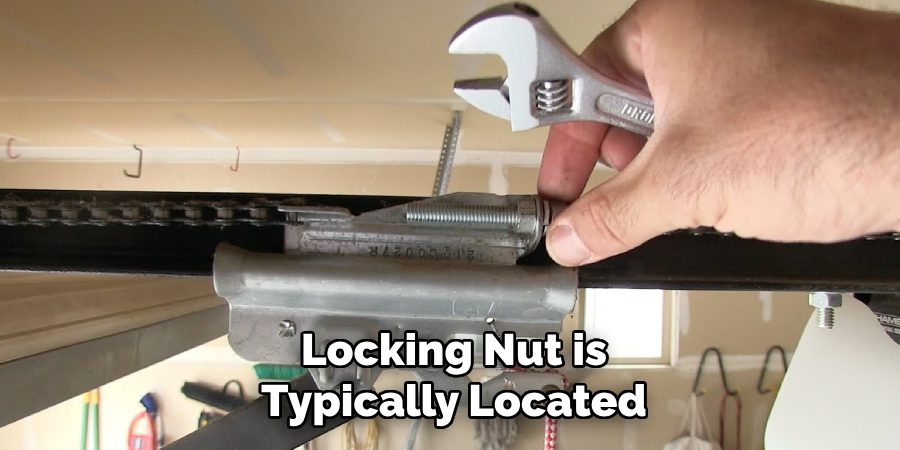
Be cautious not to fully remove it, as it only needs to be loosened enough to allow the tension adjustment nut to move freely. This step is crucial for making accurate adjustments to the chain’s tension in the following steps.
Step 5: Adjust the Tension
With the locking nut loosened, you can now use your socket wrench to tighten or loosen the tension adjustment nut. Turning it clockwise will increase tension on the chain while turning it counterclockwise will decrease tension.
Use small increments and check the chain’s tension after each turn to ensure you are not over-tightening or causing any damage. The ideal amount of tension is about half an inch of play in the chain when pulled up and down manually.
Step 6: Tighten the Locking Nut
Once you have found the optimal amount of tension for your chain, use your socket wrench to secure the locking nut by turning it clockwise. This will prevent the tension adjustment nut from moving and keep the chain at the desired tension.
You may need to hold the tension adjustment nut in place with another wrench while you tighten the locking nut, as it may rotate along with the locking nut.
Step 7: Reconnect the Opener and Test
After securing the locking nut, reconnect your garage door opener by pulling on the emergency release cord to engage it. Then, test out your garage door’s operation by opening and closing it a few times. You should notice smoother movements and less noise if you have successfully tightened the chain.
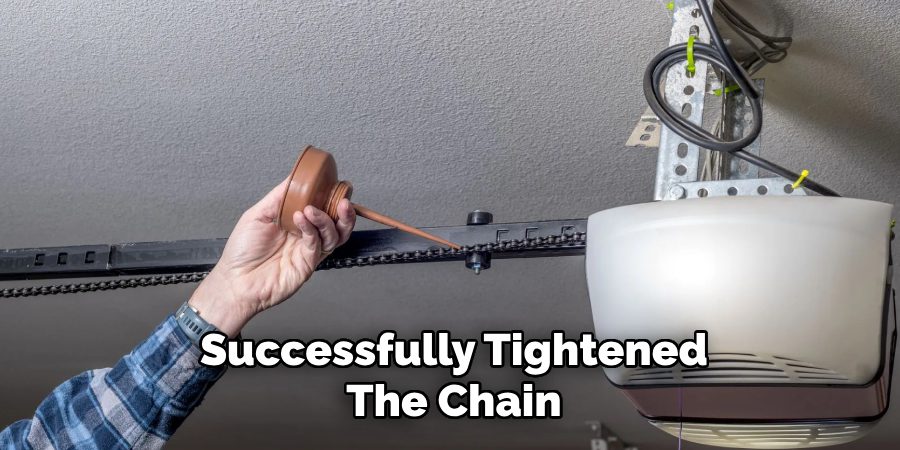
If necessary, repeat steps 5 and 6 until you find the ideal amount of tension for your system.
Following these steps on how to tighten chain on garage door will effectively tighten the chain on your garage door and ensure it operates efficiently. Remember to periodically check and adjust the tension as needed to prevent any future issues. In addition, regular maintenance of your garage door system will help prolong its lifespan and minimize potential repairs in the future.
Additional Tips
Lubricate the Chain:
While adjusting the chain tension, consider applying a small amount of lubricant to the chain to reduce friction and noise during operation. Use a garage door-specific lubricant for the best results.
Check for Wear and Tear:
While tightening the chain, it’s a good idea to inspect it for any signs of wear and tear. If you notice any significant damage or excessive wear, consider replacing the chain to avoid potential malfunctions in the future.
Consult a Professional:
If you are unsure about how to adjust your garage door’s chain tension or experience any difficulties during the process, it’s best to consult a professional for assistance. They can provide expert advice and ensure proper adjustments are made without causing further damage.
Remember, safety should always be a top priority when working on home improvement projects, so never hesitate to seek professional help if needed. With these tips and steps, you can confidently tighten the chain on your garage door and keep it functioning smoothly for years to come. Keep your garage door in good repair to enjoy easy access to your garage and protect your vehicle from the elements. Happy tightening!
Frequently Asked Questions
Q1: How Often Should I Adjust the Tension on My Garage Door Chain?
A1: It is recommended to check and adjust the tension on your garage door chain at least once a year or more frequently if you notice any issues with its operation. It’s also a good idea to check the tension after any significant weather changes, as temperature and humidity can affect the chain’s tension.
Q2: Can I Overtighten My Garage Door Chain?
A2: Yes, it is possible to overtighten your garage door chain. This can cause excessive strain on the system, leading to potential malfunctions or damage.
Q3: Why is it Important to Check and Adjust the Tension on My Garage Door Chain?
A3: Proper tension on the garage door chain ensures smooth operation and prevents unnecessary strain on the system. It also helps prolong the lifespan of your garage door opener. So, it is crucial to periodically check and adjust the tension as needed to maintain optimal performance.

Q4: Can I Adjust the Tension on My Garage Door Chain Without Disconnecting the Opener?
A4: I adjust the tension on your garage door chain without disconnecting the opener first. It is not recommended. This can be dangerous and may cause damage to the system or injury to yourself. Always follow proper safety precautions and disconnect the opener before making any adjustments to the chain tension.
Conclusion
Regularly checking and tightening your garage door chain is an essential maintenance task that can prevent costly repairs and ensure the smooth operation of your garage door opener. With the right tools and a few simple steps on how to tighten chain on garage door, you can easily tighten the chain yourself and keep your garage door system functioning properly for years to come.
Professional Focus:
Arden Bernier is dedicated to exploring and advancing patio design and maintenance, combining practical knowledge with innovative solutions. Specializing in outdoor living spaces, he provides expert advice on patio fixes, landscaping, and sustainable outdoor design. With a focus on creating functional, aesthetic, and durable outdoor environments, Arden empowers homeowners to transform their patios into beautiful and relaxing retreats.
Vision:
To inspire and assist homeowners in creating functional, aesthetically pleasing outdoor spaces. Arden encourages creativity and practical problem-solving in patio design, making outdoor living more accessible and enjoyable for everyone.
Education:
- Bachelor of Arts (BA) in Environmental Design – University of California, Berkeley.
- Master of Science (MS) in Landscape Architecture – University of Southern California.
- Specialized training in sustainable landscape design, outdoor space planning, and eco-friendly materials.
Recognition:
- Author at PatioFixes.com, providing expert advice on patio maintenance and design.
- Featured in online platforms and home improvement blogs for valuable tips on patio fixes and outdoor living.
- Recognized for his contributions to making outdoor spaces more eco-friendly and sustainable.
Expertise:
Patio expert with a focus on creating functional, beautiful, and durable outdoor living spaces. Specialization includes:
- Patio design and construction
- Outdoor furniture and décor
- Landscaping and sustainable patio solutions
- Outdoor maintenance and repair techniques
