Are you looking to repair your mesh patio chair? You’ve come to the right place! Mesh patio chairs are a popular and durable seating option for outdoor spaces.

Patio furniture is essential to any outdoor space, offering comfort and style during moments of relaxation or gatherings with family and friends. However, wear and tear can take a toll on mesh patio chairs over time, causing sagging, tears, or damage to the material. Fortunately, how to repair a mesh patio chair is a straightforward task that can save both money and the hassle of replacement.
With the right tools and effort, you can restore your chair to its former condition, ensuring it stays functional and visually appealing for years to come.
What Are the Causes of Damage?
Before we dive into the repair process, it’s essential to understand why your mesh patio chair may be damaged.
- Sun Exposure: Constant exposure to direct sunlight can cause fading and weakening of the mesh material.
- Humidity and Moisture: High humidity levels, rain, or water exposure can lead to mold, mildew, and rust on metal frames.
- Wear and Tear: Regular use over time can put a strain on the chair’s structure, causing tears or stretching in the mesh material.
These are the most common causes of damage to mesh patio chairs. Now, let’s move on to the repair process.
What Will You Need?
- Replacement Mesh Material: You can purchase replacement mesh material at most hardware stores or online.
- Scissors or Shears: Cut the new mesh to size and trim any frayed edges.
- Screwdriver and Pliers: To remove and reattach any screws or bolts on the chair frame.
- Tape Measure: To ensure accurate measurements for cutting the replacement mesh material.
- Needle and Thread: This is used to sew up tears in the mesh material.
- Cordless Drill: In case you need to drill new holes for screws or bolts.
- Rubber Mallet: To help secure the new mesh material.
Once you have all the necessary tools and materials, it’s time to start repairing your mesh patio chair!
8 Easy Steps on How to Repair a Mesh Patio Chair
Step 1: Remove the Damaged Mesh
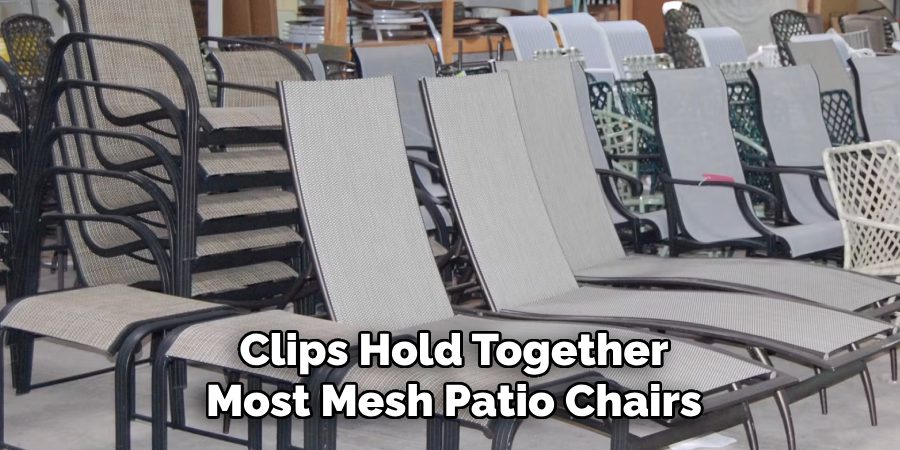
Start by carefully inspecting the chair to identify how the damaged mesh is secured to the frame. Screws, bolts, or clips hold together most mesh patio chairs. Use a screwdriver or pliers to remove any screws or bolts holding the mesh in place. Keep these fasteners safe, as you will need them when attaching the new mesh later.

If clips or other securing mechanisms are present, gently release them to avoid bending or damaging the frame. Take your time during this process to ensure you don’t cause further harm to the chair structure or yourself. Once loosened, pull the damaged mesh away from the frame and set it aside for disposal. Inspect the frame thoroughly to ensure it’s free of sharp edges or debris that could damage the new mesh material during installation.
Step 2: Measure and Cut the New Mesh
With the damaged mesh removed, it’s time to prepare the new replacement material. Spread the new mesh out on a flat surface and place the chair frame over it. Use a measuring tape to determine the exact dimensions needed for the replacement mesh, adding a few extra inches around all edges to allow for proper fastening and adjustments.

Mark the measurements on the mesh using chalk or a fabric marker. Carefully cut along the marked lines with sharp scissors or a utility knife to ensure clean, even edges. Double-check the cut piece against the chair frame to confirm it fits correctly before proceeding to the next step.
Step 3: Attach the New Mesh
Attach the new mesh to the chair frame by first securing one edge. Align the newly cut mesh with the frame, ensuring it lays flat and is centered properly. Use a staple gun, industrial clips, or the appropriate hardware recommended for your chair model to fasten the mesh securely to the frame.
Start from the middle of the edge and work outward to avoid wrinkles or uneven tension in the material. Gradually move to the opposite edge, pulling the mesh taut as you secure it to maintain a smooth and firm surface. Repeat the process for the remaining edges, ensuring even tension throughout. Trim any excess material with scissors for a neat finish.
Step 4: Reattach the Chair Components
After securing the new mesh, reattach any chair components that were removed earlier. This may include armrests, screws, or other hardware. Ensure all parts are correctly aligned and tightened to maintain the chair’s stability and functionality.

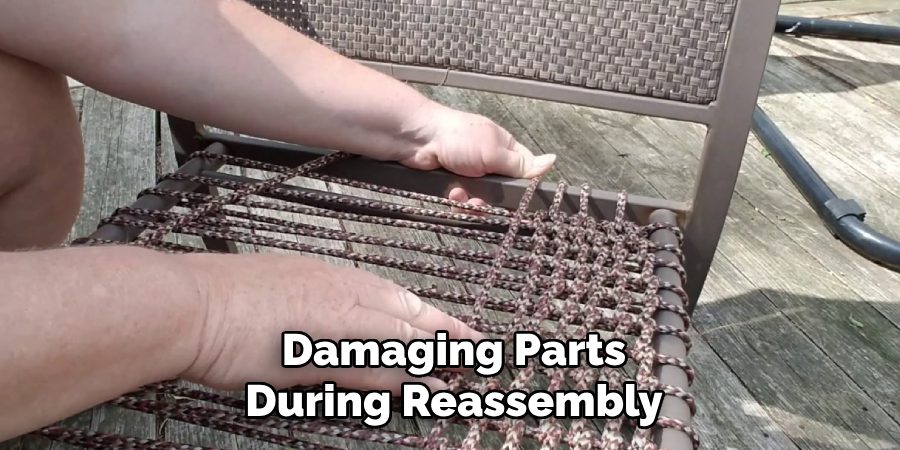
Use the appropriate tools and refer to the chair’s assembly guide, if available, to avoid damaging parts during reassembly. Once all components are securely in place, test the chair by gently applying pressure to ensure the mesh holds firm and the chair operates as intended.
Step 5: Perform Final Inspections
With the chair fully reassembled, conduct a thorough inspection to ensure everything is adequately secured and functioning. Check for any loose screws, uneven mesh tension, or misaligned components. Sit on the chair and adjust its settings, such as recline or height, to confirm comfort and stability. Address any issues promptly to prevent long-term damage or discomfort during use. Completing these final checks ensures the chair is restored to its optimal condition.
Step 6: Regular Maintenance Tips
To keep your chair in excellent condition, implement a regular maintenance routine. Periodically check for loose screws or bolts and tighten them as needed. Clean the mesh and other components with a soft cloth and mild cleaner to remove dust and dirt.

Avoid exposing the chair to extreme temperatures, excessive moisture, or direct sunlight, as these can degrade the materials over time. Regular maintenance extends the chair’s lifespan and ensures consistent comfort and functionality.
Step 7: Proper Usage Guidelines
Using the chair correctly is essential to maintain its condition and ensure comfort. Constantly adjust the chair to fit your body correctly, including the height, armrests, and lumbar support.
Avoid putting excessive weight or pressure on parts not built for it, like armrests or the backrest, as this can wear down the components prematurely. When moving the chair, lift it carefully instead of dragging it, especially on rough surfaces, to prevent unnecessary strain on the wheels and frame. Following these guidelines will help you maximize the chair’s durability and performance.
Step 8: Warranty and Support
Familiarize yourself with the chair’s warranty and available support options to ensure a smooth experience if any issues arise. Keep the purchase receipt and warranty documentation in a safe place for reference. If you encounter defects or need repair assistance, contact the manufacturer or retailer within the warranty period. Many companies also offer customer support services for troubleshooting, replacement parts, or advice on maintaining the chair. Utilizing these resources will help you address any concerns promptly and keep your chair in optimal condition.

By following these steps and tips, you can successfully repair your mesh patio chair and maintain its longevity. Remember to take your time during the process, use the appropriate tools, and prioritize safety to ensure a successful outcome.
5 Things You Should Avoid
- Using the Wrong Tools: Avoid using improper tools not designed for repairing patio chairs, as they can damage the frame or mesh further and make the repair process more difficult.
- Skipping Proper Measurements: Do not guess the dimensions of the mesh fabric. Incorrect measurements can result in a misfit, leaving the chair unusable or requiring another repair.
- Neglecting to Check Frame Stability: Before starting repairs, ensure the frame is sturdy and free from cracks or rust. Failing to address frame issues can make the repair effort futile.
- Using Low-Quality Materials: Avoid using cheap or low-quality mesh replacements, screws, or fasteners. These may not withstand prolonged use and exposure to outdoor elements.
- Overlooking Maintenance Post-Repair: Once repaired, don’t ignore routine maintenance. The repaired chair may deteriorate quickly without proper care, wasting time and effort.
What Fabric is Used on Patio Furniture?
Most mesh patio chairs are made from PVC-coated polyester, acrylic, or polyethylene.
- PVC-Coated Polyester: This material is durable, water-resistant, and can withstand various weather conditions. It can also be easily cleaned with a mild detergent solution.
- Acrylic: Acrylic fabric is known for its resistance to fading and mildew. It is also easy to clean and maintain.
- Polyethylene: Polyethylene mesh is lightweight, sturdy, and resistant to UV rays and moisture. It can be easily cleaned with soap and water.
These materials are commonly used in outdoor furniture as they are weather-resistant and require minimal maintenance.
Conclusion
How to repair a mesh patio chair can be a straightforward and rewarding process if approached carefully.
By gathering the right materials, following the proper steps, and selecting durable fabric, you can extend the life of your chair and save money. Always ensure precise measurements to avoid fitting issues, and take the time to secure the mesh tightly for optimal support and appearance. After the repair, regular maintenance will help keep the chair in excellent condition, ensuring you can enjoy your outdoor furniture for years to come.
Hopefully, this guide has provided the necessary information and tips to repair your mesh patio chair successfully. Happy fixing!

Professional Focus
Oliver Wood, a passionate patio designer, specializes in creating comfortable and inviting outdoor spaces that enhance relaxation and entertainment. His work combines a deep understanding of design with a love for nature, making him a standout professional in the field of outdoor living spaces. Through his thoughtful approach, he transforms everyday patios into extraordinary retreats for family and friends.
About the Author
Oliver Wood, a skilled patio designer, shares his expertise on outdoor living through his designs and insights. With a background in patio design and a genuine passion for creating beautiful spaces, he encourages others to invest in their outdoor environments, enhancing their homes with functional and inviting spaces for relaxation and entertainment.
Education History
University: Virginia Union University
Oliver’s education equipped him with the knowledge and skills to design patios that merge aesthetics with comfort, transforming outdoor areas into beautiful extensions of the home.
Expertise:
- Patio Design and Outdoor Living Spaces
- Functional and Aesthetic Landscaping
- Comfortable and Inviting Outdoor Environments
- Design Philosophy for Family-Oriented Spaces
- Creating Spaces for Relaxation and Entertainment
